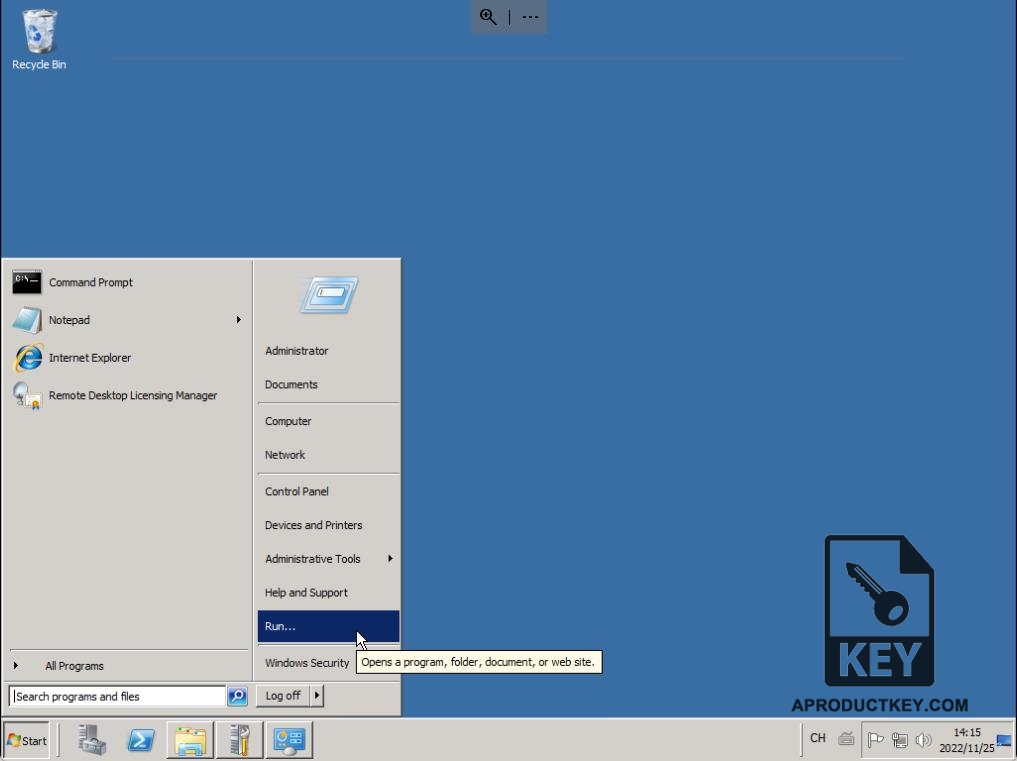
Posted on

સિસ્ટમ પ્રોડક્ટ કી કેવી રીતે અનઇન્સ્ટોલ કરવી?

જ્યારે આપણે સિસ્ટમને સક્રિય કરીએ છીએ અથવા તેનો ઉપયોગ કરીએ છીએ, અમે કેટલીકવાર કેટલીક ભૂલો અનુભવીએ છીએ, જેમ કે સક્રિયકરણ કોડ અમાન્ય છે, સક્રિયકરણ કોડ સમાપ્ત થાય છે, અને આપણે મૂળ સક્રિયકરણ કોડને અનઇન્સ્ટોલ કરવાની જરૂર છે. તો આપણે સિસ્ટમ પ્રોડક્ટ કીને કેવી રીતે અનઇન્સ્ટોલ કરીએ?

Open Windows "Start", click "Run"

વિન્ડોઝ ખોલો “શરૂ કરો”, ક્લિક કરો “ચલાવો”

Input "cmd"

ઇનપુટ “cmd”

Boot up a Command Prompt

Boot up a Command Prompt

Input "slmgr.vbs -upk",Remove the existing Product Key

ઇનપુટ “slmgr.vbs -upk”,Remove the existing Product Key

slmgr.vbs -upk

This method is applicable to multiple Windows systems, such as Windows 7 / 8 / 8.1 / 10 / 11, WIndows Server 2008 / 2008 R2 / 2012 / 2012 R2 / 2016 / 2019 / 2022. It is not limited to the system edition, such as standard, એન્ટરપ્રાઇઝ, ડેટાસેન્ટર, ઘર, તરફી ( professinal ), આવશ્યક, અંતિમ, વેબ, hpc, વ્યક્ત, premium, education, Pro for Worksations, education N etc

Posted on

વિઝ્યુઅલ સ્ટુડિયો 2022 ઇન્સ્ટોલેશન ટ્યુટોરીયલ

1、 VS સ્થાપન

1. VS સત્તાવાર વેબસાઇટ: click here

After entering the official website, સમુદાય શોધો 2022 (સમુદાય આવૃત્તિ) — વિકાસકર્તાઓ તેનો ઉપયોગ શૈક્ષણિક હેતુઓ માટે મફત અને ઓપન સોર્સ માટે કરી શકે છે.


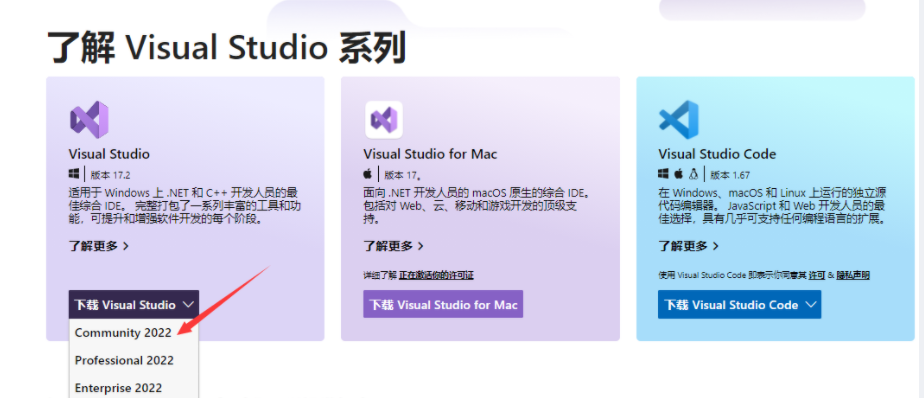
2. માં ક્લિક કર્યા પછી, vs.exe ફાઇલ આપમેળે ડાઉનલોડ થશે (નીચેની આકૃતિમાં બતાવ્યા પ્રમાણે):

3. ડાઉનલોડ કર્યા પછી, નીચેની આકૃતિમાં બતાવ્યા પ્રમાણે, click to Next.

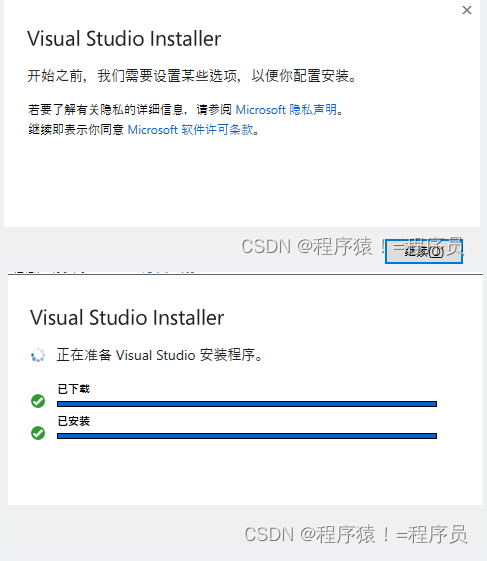
4. Installation completed

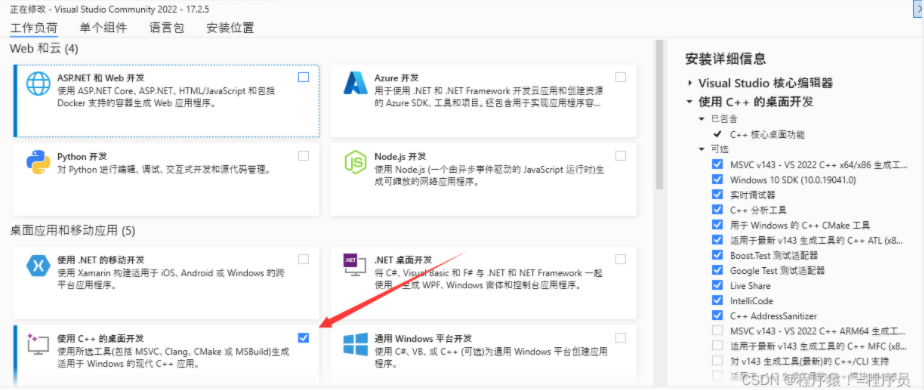
After the installation is completed, you can select the workload. It is recommended to check what you can use. Selecting all will occupy a lot of memory. If the learning content is increased later, you can still download it again. If you only want to learn c/c++, check it as shown in the following figure.

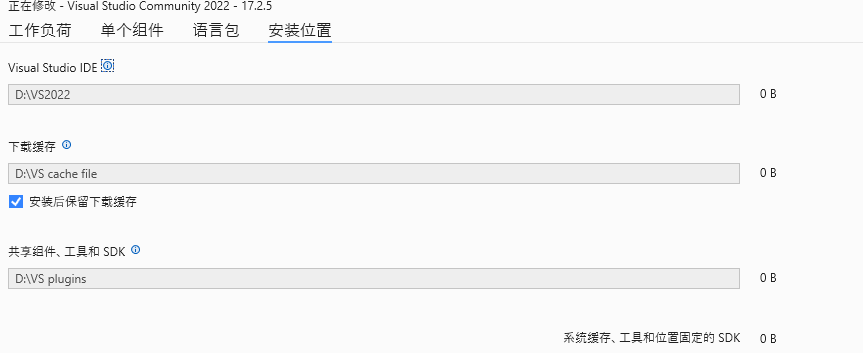
5. Installation position

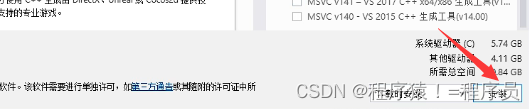
Click Change to change the installation location. For the three files, you have selected different folders on disk D, as shown in the following figure (નૉૅધ: VS IDE is placed in the default location, which may run faster)

6. Complete the above operations, click Install, and wait for the download to complete.

2、 Test installation succeeded
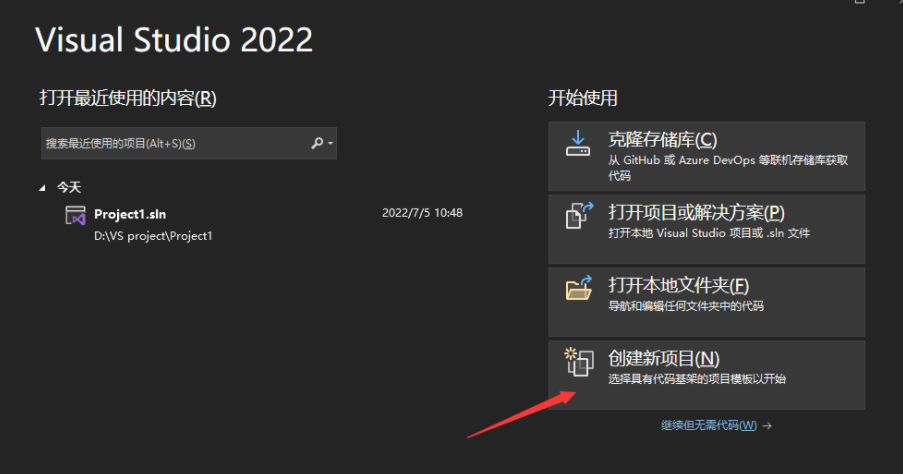
1. Create a project

પગલું 1: Open VS and click Create New Project

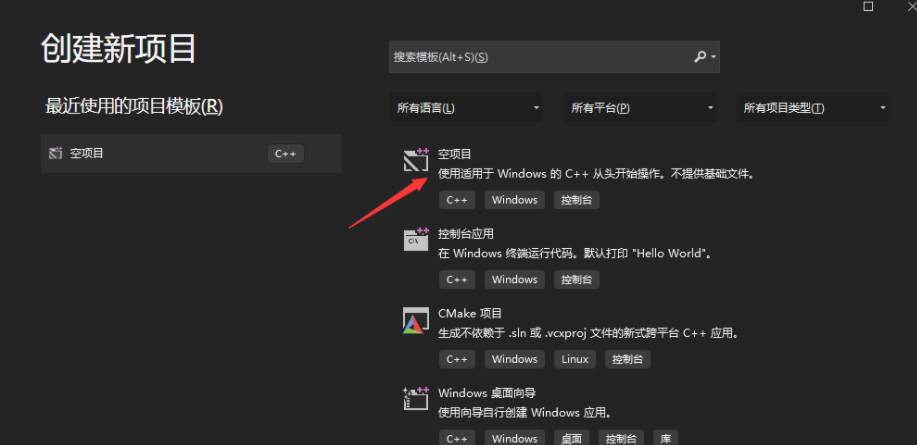
પગલું 2: Click on the empty item

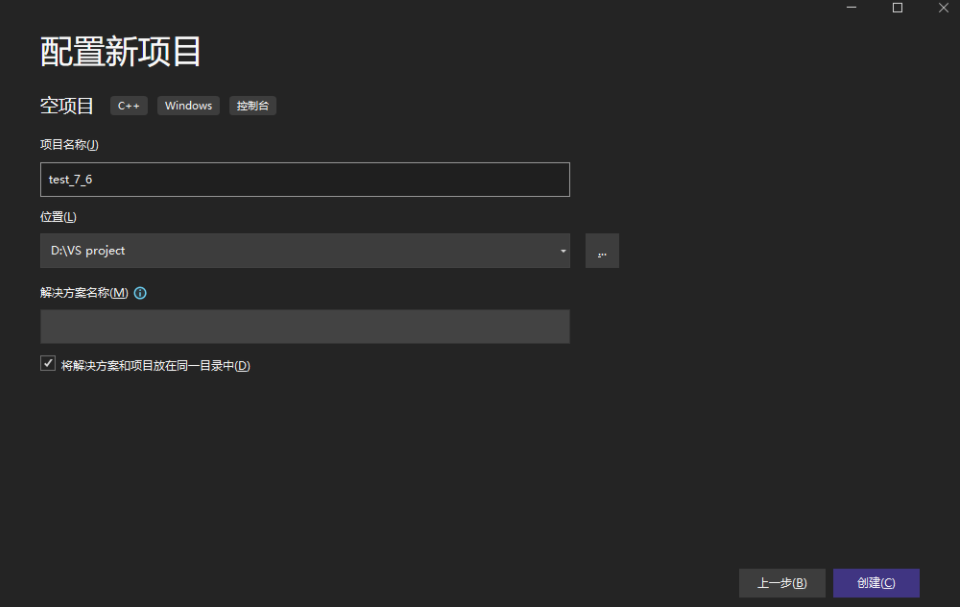
પગલું 3: Enter your own project name in the project name; select the storage location of the project in the location (it is recommended to create a separate folder for storing the project in the future) and finally click Create to complete the project creation.

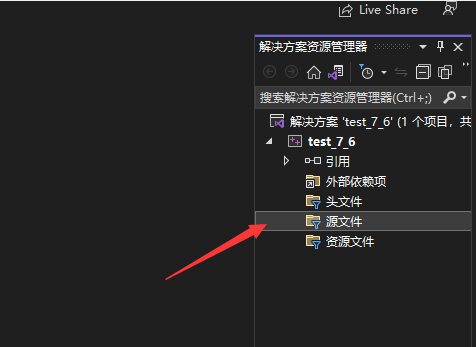
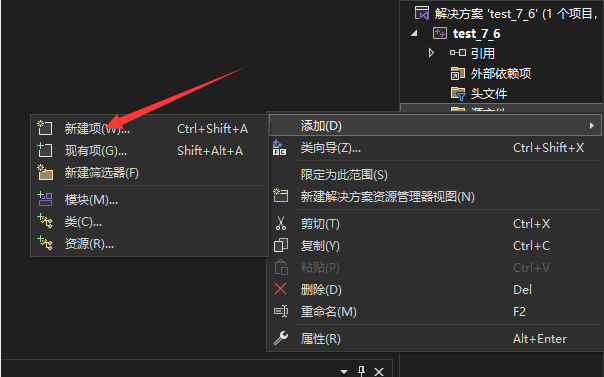
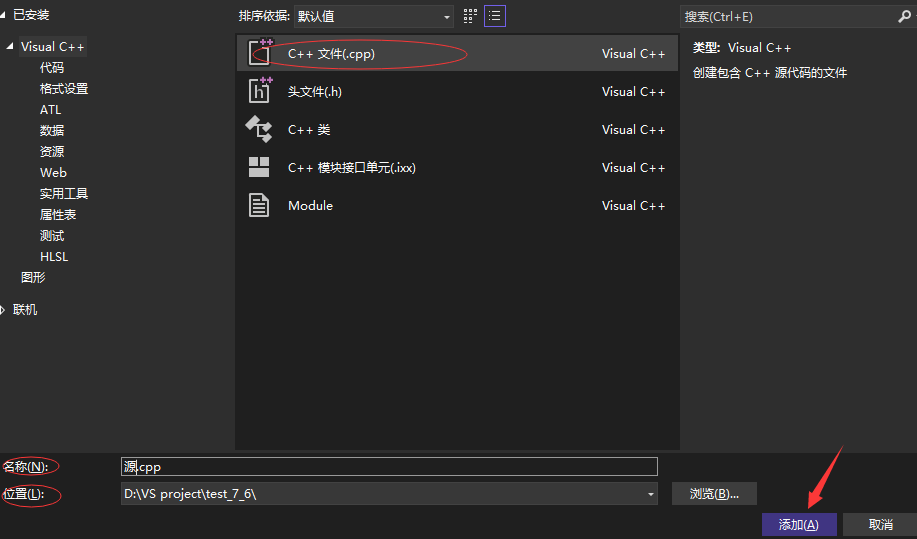
2. Create a source file

After the mouse finds the source file, right-click, click Add , and then click New Item . After selecting the c++ file , change the storage location and source file name , and then click Add to complete the creation of the source file.
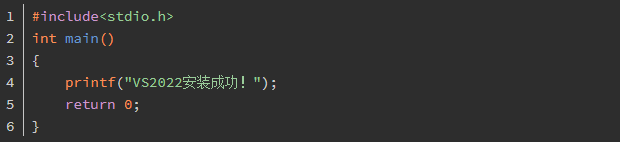
3. Write code

Once the project and source files have been created, the code can be written.

4. Compile the code + run

  • Method 1: Shortcut key ctrl+f5
  • Method 2: Click on the local Windows debugger

5. Running results

The running result is shown in the figure above, which proves that the VS2022 installation is complete, and congratulations on the completion of your own first c language project.

If you want to buy વિઝ્યુઅલ સ્ટુડિયો 2022 ઉત્પાદન કી, please order the link directly

Posted on

વિન્ડોઝને સક્રિય અને નિષ્ક્રિય કરવા વચ્ચેનો તફાવત 11? સક્રિયકરણના ફાયદા શું છે?

1. જ્યારે વિન્ડોઝ 11 સક્રિય થયેલ નથી, વિન્ડોઝને સક્રિય કરવા માટે જરૂરી વોટરમાર્ક ડેસ્કટોપના નીચેના જમણા ખૂણે દેખાશે. તેની દૈનિક કામગીરી પર મોટી અસર પડશે, જેમ કે સ્ક્રીન રેકોર્ડિંગ અને સ્ક્રીનશોટની પ્રક્રિયામાં સામગ્રીને દબાણ કરવું. લોકોને ખરાબ દેખાવ અને લાગણી આપો.

2. જ્યારે વિન્ડોઝ 11 સક્રિય થયેલ નથી, it is impossible to personalize the desktop background and theme. The wallpaper and theme color will become gray, and the Microsoft account will not be synchronized, nor can the main settings of the account be synchronized on the Microsoft device. The user experience will drop a lot every time you turn on the phone.

3. જ્યારે વિન્ડોઝ 11 સક્રિય થયેલ નથી, the performance will be affected in part. Part of the power consumption of Windowsinactive CPU will not be released, and the virtual memory of the computer will often account for more than 3G. Whether you play games or watch TV, you will feel stuck when using project files.

4. The Windows 11 system is not activated and cannot use the synchronization function of Microsoft account. It can synchronize settings on different Microsoft devices.

Posted on

વિન્ડોઝ સર્વરને કેવી રીતે અપગ્રેડ કરવું 2012 વિન્ડોઝ સર્વર માટે R2 મૂલ્યાંકન આવૃત્તિ 2012 R2 સ્ટાન્ડર્ડ વર્ઝન?

પગલું 1: તમે cmd ખોલો (એડમિનિસ્ટ્રેટર તરીકે ચલાવો), then you type

dism /online /get-targeteditions

પગલું 2: You copy and paste this code in cmd

If you want to upgrade to Windows Server 2012 R2 ધોરણ તમે લખો છો:

ડિસમ/ઓનલાઈન/સેટ-એડીશન:સર્વરસ્ટાન્ડર્ડ/પ્રોડક્ટકી:XXXXX-XXXXX-XXXXX-XXXXX-XXXXX /accepteula

નૉૅધ:

જો તમે "અપગ્રેડ નિષ્ફળ" જુઓ, તમે તમારા Windows સર્વરને પુનઃપ્રારંભ કરો 2012 R2. It will upgrade Windows Server 2012 R2 Evaluation to Standard.

Buy Windows Server 2012 R2 સ્ટાન્ડર્ડ પ્રોડક્ટ કી

Posted on

વિન્ડોઝ સર્વરને કેવી રીતે અપગ્રેડ કરવું 2012 વિન્ડોઝ સર્વર માટે R2 મૂલ્યાંકન આવૃત્તિ 2012 R2 ડેટાસેન્ટર સંસ્કરણ?

પગલું 1: તમે cmd ખોલો (એડમિનિસ્ટ્રેટર તરીકે ચલાવો), then you type

dism /online /get-targeteditions

પગલું 2: You copy and paste this code in cmd

If you want to upgrade to Windows Server 2012 R2 ડેટાસેન્ટર તમે ટાઇપ કરો છો:

ડિસમ/ઓનલાઈન/સેટ-એડીશન:સર્વરડેટાસેન્ટર/પ્રોડક્ટકી:XXXXX-XXXXX-XXXXX-XXXXX-XXXXX /accepteula

નૉૅધ:

જો તમે "અપગ્રેડ નિષ્ફળ" જુઓ, તમે તમારા Windows સર્વરને પુનઃપ્રારંભ કરો 2012 R2. It will upgrade Windows Server 2012 R2 Evaluation to Datacenter.

Buy Windows Server 2012 R2 ડેટાસેન્ટર પ્રોડક્ટ કી

Posted on

વિન્ડોઝ સર્વરને કેવી રીતે અપગ્રેડ કરવું 2016 વિન્ડોઝ સર્વર માટે મૂલ્યાંકન આવૃત્તિ 2016 માનક સંસ્કરણ?

પગલું 1: તમે cmd ખોલો (એડમિનિસ્ટ્રેટર તરીકે ચલાવો), then you type

dism /online /get-targeteditions

પગલું 2: You copy and paste this code in cmd

If you want to upgrade to Windows Server 2016 તમે ટાઇપ કરો છો તે માનક:

ડિસમ/ઓનલાઈન/સેટ-એડીશન:સર્વરસ્ટાન્ડર્ડ/પ્રોડક્ટકી:XXXXX-XXXXX-XXXXX-XXXXX-XXXXX /accepteula

નૉૅધ:

જો તમે "અપગ્રેડ નિષ્ફળ" જુઓ, તમે તમારા Windows સર્વરને પુનઃપ્રારંભ કરો 2016. It will upgrade Windows Server 2016 Evaluation to Standard.

Buy Windows Server 2016 માનક ઉત્પાદન કી

Posted on

વિન્ડોઝ સર્વરને કેવી રીતે અપગ્રેડ કરવું 2016 વિન્ડોઝ સર્વર માટે મૂલ્યાંકન આવૃત્તિ 2016 ડેટાસેન્ટર સંસ્કરણ?

પગલું 1: તમે cmd ખોલો (એડમિનિસ્ટ્રેટર તરીકે ચલાવો), then you type

dism /online /get-targeteditions

પગલું 2: You copy and paste this code in cmd

If you want to upgrade to Windows Server 2016 ડેટાસેન્ટર તમે લખો છો:

ડિસમ/ઓનલાઈન/સેટ-એડીશન:સર્વરડેટાસેન્ટર/પ્રોડક્ટકી:XXXXX-XXXXX-XXXXX-XXXXX-XXXXX /accepteula

નૉૅધ:

જો તમે "અપગ્રેડ નિષ્ફળ" જુઓ, તમે તમારા Windows સર્વરને પુનઃપ્રારંભ કરો 2016. It will upgrade Windows Server 2016 Evaluation to Datacenter.

Buy Windows Server 2016 ડેટાસેન્ટર પ્રોડક્ટ કી

Posted on

વિન્ડોઝ સર્વરને કેવી રીતે અપગ્રેડ કરવું 2019 વિન્ડોઝ સર્વર માટે મૂલ્યાંકન આવૃત્તિ 2019 ડેટાસેન્ટર સંસ્કરણ?

પગલું 1: તમે cmd ખોલો (એડમિનિસ્ટ્રેટર તરીકે ચલાવો), then you type

dism /online /get-targeteditions

You will see Windows Server 2019 editions you can upgrade

પગલું 2: You copy and paste this code in cmd

If you want to upgrade to Windows Server 2019 ડેટાસેન્ટર તમે લખો છો:

ડિસમ/ઓનલાઈન/સેટ-એડીશન:સર્વરડેટાસેન્ટર/પ્રોડક્ટકી:XXXXX-XXXXX-XXXXX-XXXXX-XXXXX /accepteula

નૉૅધ:

જો તમે "અપગ્રેડ નિષ્ફળ" જુઓ, તમે તમારા Windows સર્વરને પુનઃપ્રારંભ કરો 2019. It will upgrade Windows Server 2019 Evaluation to Datacenter.

Buy Windows Server 2019 ડેટાસેન્ટર પ્રોડક્ટ કી

Posted on

વિન્ડોઝ સર્વરને કેવી રીતે અપગ્રેડ કરવું 2019 વિન્ડોઝ સર્વર માટે મૂલ્યાંકન આવૃત્તિ 2019 માનક સંસ્કરણ?

પગલું 1: તમે cmd ખોલો (એડમિનિસ્ટ્રેટર તરીકે ચલાવો), then you type

dism /online /get-targeteditions

You will see Windows Server 2019 editions you can upgrade

પગલું 2: You copy and paste this code in cmd

If you want to upgrade to Windows Server 2019 તમે ટાઇપ કરો છો તે માનક:

ડિસમ/ઓનલાઈન/સેટ-એડીશન:સર્વરસ્ટાન્ડર્ડ/પ્રોડક્ટકી:XXXXX-XXXXX-XXXXX-XXXXX-XXXXX /accepteula

નૉૅધ:

જો તમે "અપગ્રેડ નિષ્ફળ" જુઓ, તમે તમારા Windows સર્વરને પુનઃપ્રારંભ કરો 2019. It will upgrade Windows Server 2019 Evaluation to Stardard.

Buy Windows Server 2019 Stardard Product Key

Posted on

વિન્ડોઝ સર્વરને કેવી રીતે અપગ્રેડ કરવું 2022 વિન્ડોઝ સર્વર માટે મૂલ્યાંકન આવૃત્તિ 2022 સ્ટ્રેન્ડર્ડ સંસ્કરણ?

પગલું 1: તમે cmd ખોલો (એડમિનિસ્ટ્રેટર તરીકે ચલાવો), then you type

dism /online /get-targeteditions

પગલું 2: You copy and paste this code in cmd

If you want to upgrade to Windows Server 2022 Stardard તમે ટાઇપ કરો:

ડિસમ/ઓનલાઈન/સેટ-એડીશન:સર્વરસ્ટાન્ડર્ડ/પ્રોડક્ટકી:XXXXX-XXXXX-XXXXX-XXXXX-XXXXX /accepteula

નૉૅધ:

જો તમે "અપગ્રેડ નિષ્ફળ" જુઓ, તમે તમારા Windows સર્વરને પુનઃપ્રારંભ કરો 2022. It will upgrade Windows Server 2022 Evaluation to Stardard.

Buy Windows Server 2022 Strandard Product Key

Posted on

વિન્ડોઝ સર્વરને કેવી રીતે અપગ્રેડ કરવું 2022 વિન્ડોઝ સર્વર માટે મૂલ્યાંકન આવૃત્તિ 2022 ડેટાસેન્ટર સંસ્કરણ?

પગલું 1: તમે cmd ખોલો (એડમિનિસ્ટ્રેટર તરીકે ચલાવો), then you type

dism /online /get-targeteditions

પગલું 2: You copy and paste this code in cmd

If you want to upgrade to Windows Server 2022 ડેટાસેન્ટર તમે લખો છો:

ડિસમ/ઓનલાઈન/સેટ-એડીશન:સર્વરડેટાસેન્ટર/પ્રોડક્ટકી:XXXXX-XXXXX-XXXXX-XXXXX-XXXXX /accepteula

નૉૅધ:

જો તમે "અપગ્રેડ નિષ્ફળ" જુઓ, તમે તમારા Windows સર્વરને પુનઃપ્રારંભ કરો 2022. It will upgrade Windows Server 2022 Evaluation to Datacenter.

Buy Windows Server 2022 ડેટાસેન્ટર પ્રોડક્ટ કી

Posted on

જીત્યા પછી કાળી સ્ક્રીન ફરતી રહે તો મારે શું કરવું જોઈએ 11 સિસ્ટમ શરૂ થાય છે?

1. જો તમે લોગ આઉટ કરી શકતા નથી અથવા આ પેજ ખોલી શકતા નથી, તમારે પાવર બટન સાથે કમ્પ્યુટરને ફરીથી પ્રારંભ કરવાની જરૂર છે.

2. કમ્પ્યુટર ઘણી વખત પુનઃપ્રારંભ કર્યા પછી, તે સિસ્ટમ રિપેર પૃષ્ઠ દાખલ કરશે અને ક્લિક કરશે “અદ્યતન વિકલ્પો”.

3. દાખલ કરવા માટે ક્લિક કરો “મુશ્કેલીનિવારણ”.

4. અમે અદ્યતન વિકલ્પો પસંદ કરીએ છીએ. જો આપણે અંદર પ્રવેશી શકતા નથી, we have to reset the computer.

5. You need to enter Start Settings. દબાવો “F4on the keyboard to enter the safe mode.

6. Click in the security mode to enter Windows Update, and select Update History.

7. Then enter theUninstall Updates” પાનું, uninstall some recent update files, and restart the computer to solve the problem.